Introduction
Acer monitors are known for their quality and elegant designs, but there are occasions when you need to remove the stand. Disassembling the stand can be necessary for cleaning, repairs, transport, or to mount the monitor on a wall. Understanding the correct method ensures you do not damage any components. This guide walks you through the process, helping you accomplish this task smoothly and safely.

Reasons to Disassemble Your Acer Monitor Stand
Removing the monitor stand might become necessary under several circumstances. You might want to reconfigure your desk space for a dual monitor setup, or perhaps you need to transport the monitor safely. Sometimes, accessing particular parts of the monitor for cleaning or repair requires detaching the stand. Thus, knowing how to appropriately disassemble it is both practical and useful.
Tools and Preparations
To ensure a smooth disassembly process, you must prepare adequately. Having the right tools and a well-organized workspace are essential first steps before taking apart your Acer monitor stand.
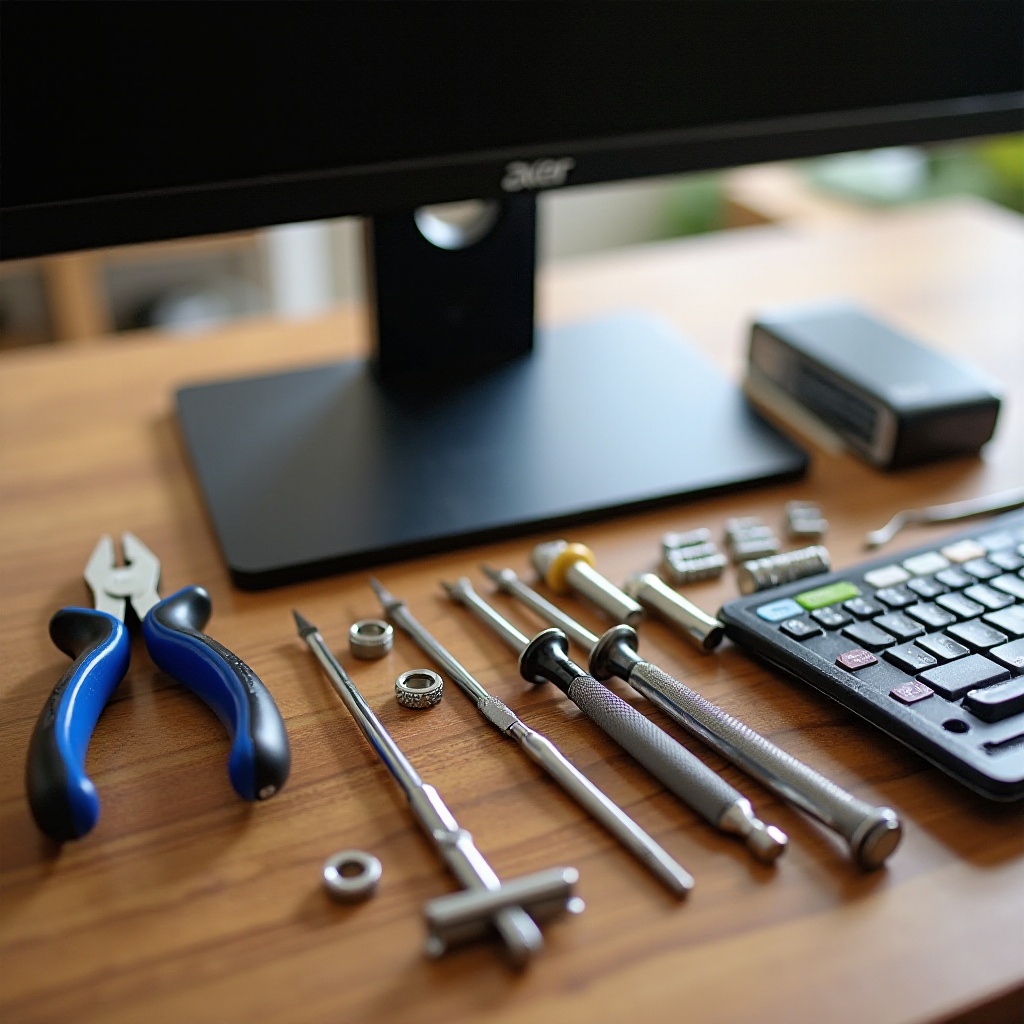
- Essential Tools Needed: The process requires a Phillips screwdriver and a flathead screwdriver. These will help loosen screws securing different parts of the stand.
- Safety Precautions: Always disconnect your monitor from power before beginning the process. Wearing gloves can protect your hands from sharp edges or accidental slips.
- Setting Up a Safe Workspace: Ensure you have a flat, stable workspace to prevent the monitor from tipping over. Using a soft cloth can protect the screen from scratches when it is face down during the procedure.
These preparations will help guarantee that the disassembly goes off without a hitch.
Step-by-Step Guide to Disassembling the Monitor Stand
The following guide will lead you through each step, making the process straightforward:
-
Power Down and Unplug: Begin by turning off your monitor and unplugging all connected cables. This prevents electrical accidents and gives you full access to the monitor.
-
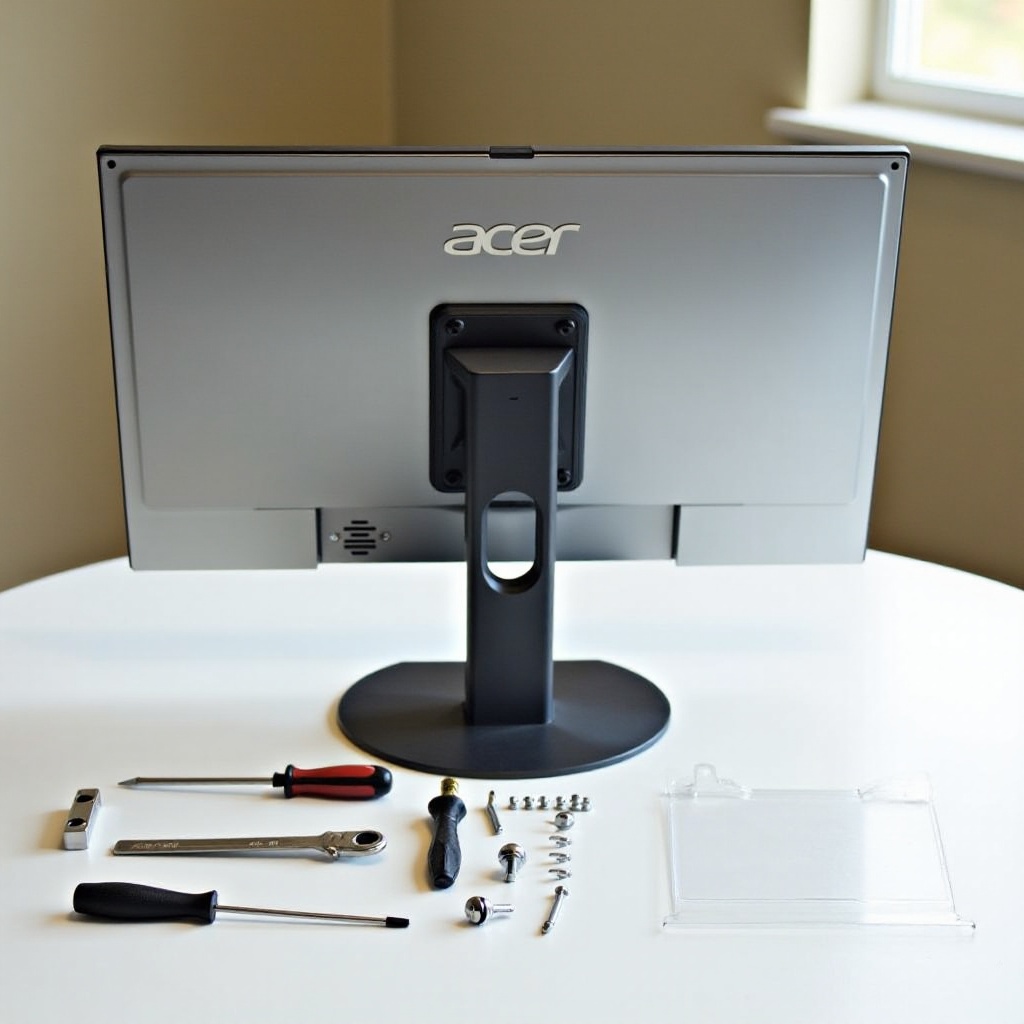
Removing the Monitor Display: Place the monitor face down on the soft cloth. Find the screws that attach the monitor to the stand and carefully unscrew them using the Phillips screwdriver. Keep one hand on the display to prevent it from falling as you remove the last screws.
-
Detaching the Stand from the Base: Once the display is detached, focus on the base of the monitor stand. Use the screwdriver to remove any screws holding the base to the stand. With the screws removed, the base should easily disconnect.
-
Handling and Storing Parts Safely: Organize and label any screws or parts you remove so that you can reassemble the monitor later. Store these components in a secure location to prevent loss.
These steps make the disassembly process easy and prevent damage to your device.
Troubleshooting Common Issues During Disassembly
Even with preparation, you may face challenges when disassembling your monitor stand. Here’s how to address common issues:
-
Dealing with Stubborn Screws: If a screw is stuck, gently press down while turning the screwdriver or try using a different size that fits better. Avoid applying excessive force to prevent stripping the screw.
-
Addressing Tight or Stuck Components: Be patient and use soft taps or a small amount of lubricant on parts that seem glued together. Avoid excessive force to preserve the integrity of the monitor.
By resolving these issues calmly, you ensure a stress-free disassembly experience.
Successful Reassembly and Monitor Maintenance Tips
After disassembly, you will need to reassemble your monitor stand. Proper maintenance can also keep your equipment in good condition:
-
Reassembly Steps: Reverse the disassembly process, starting by reattaching the base to the stand using the labeled screws. Secure the monitor to the stand, ensuring all screws are tightened correctly but not over-tightened.
-
Regular Maintenance Tips: Regularly dust the monitor and stand to prevent environmental wear. Periodically check that screws remain tight to maintain stability.
These practices will help extend the lifespan and functionality of your Acer monitor and stand.
Conclusion
Disassembling your Acer monitor stand doesn’t have to be daunting. With the right tools and guidance, you can complete the task efficiently, whether for workspace reconfiguration, repair, or cleaning. Always ensure safety precautions are in place and follow the outlined steps for both disassembly and reassembly.
Frequently Asked Questions
Can I disassemble the stand without any tools?
No, a Phillips screwdriver and sometimes a flathead screwdriver are essential for removing screws.
What should I do if a screw is stripped during disassembly?
Use a rubber band for extra grip or a screw extractor set to safely remove stripped screws.
Is it necessary to disconnect all cables before disassembly?
Yes, disconnecting all cables, including power cables, prevents damage and ensures safety during disassembly.